Saddle Height
A basic, static, function to determine saddle height is with a book between your legs, feet 6” apart. Measure in centimeters, from the floor to the top of the book. Multiply this number by .883, and you have a idea where to start (Lemond Method).
DO NOT RELY ON EXCLUSIVELY ON LEG LENGTH MEASUREMENTS FOR OPTIMAL SADDLE HEIGHT!
The ratio between femur and tibia (and Ankling Style/Technique) impacts saddle height. longer Femur = lower saddle (primarily horizontal) ; longer tibia = higher saddle (primarily vertical).
Foot length, cleat position, hamstring length, discipline (Road/Tri/TT/MTB), ankling technique, etc., ALL impact saddle height.
“Google” images of Professional TT positions. Looks like the saddles are too low, right? Lower is more aerodynamic. Typical for professional road cyclists, too, but (nearly always) this changes under load with accompanying heel drop.
Barring Injury, I suggest altering saddle height slightly during rides (post-warm-up, 1-3mm). This will improve proprioceptive awareness, and reduce the range of what is NOT ideal.
It is important to identify this range internally/subjectively, because the distance between bottom bracket and saddle changes when altering componentry (shoes, pedals, saddle), saddle fore/aft, and saddle-bar differential.
If you are really good at math, there are formulas to calculate saddle height relative to component modifications, but there is no way to account for changes in connective tissue/muscle function, relative to temperature, training, and time in the saddle.
Try this:
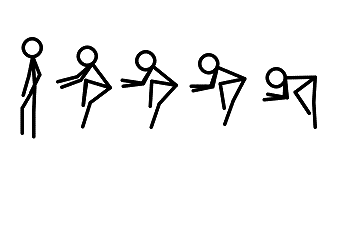
Standing, bend forward, with hands hanging towards your feet (do NOT stretch). Stand up and do it again. Feels slightly different (legs/low-back), right? No matter how many times you bend forward, the experience will NEVER be identical. Yoga 101: It is impossible to replicate experience.
Listen to your body and adjust your bike!
Saddle Fore/Aft — Longitudinal Balance
Morphology, Femur, Foot and Hip Angle are the most important anatomical variables for longitudinal saddle positioning, barring a predetermined top-tube length
Morphology:
Conceptually, longitudinal alignment is like a seesaw. The tendency to balance is achieved with equal weight and proximity from the fulcrum (hinge).
To demonstrate this principle, place an object 3ft. in front of your feet on the floor. Try to pick it up with straight legs. Now try with bent legs. Moving your butt back balances the fulcrum, drawing mass from your upper body and toes to our lower body and heels.

Next time you ride your bike, tilt and tuck your hips to decrease and increase weight relative to the fulcrum. Notice what happens to the arms. Tucking decreases upper-trunk mass and effective length; tilting increases upper-trunk mass and effective length.
Femur Length:
A popular method to determine fore-aft saddle position is to drop a plumb-line from your knee cap and adjust so that it descends to the front of your pedal spindle, with crank is at 90 degrees (or parallel to the floor).
This does not work for Tri-Fitting.
These images share identical hip with very different horizontal knee positions.

For more information: The myth of K.O.P.S (knee over pedal spindle)”, by Keith Bontrager.
Hip Angle:
The ideal hip angle is a function of range of motion, muscle recruitment and firing sequence. Many fitters feel that hip angle is a constant, regardless of discipline.
A shallow hip-angle can recruit unnecessary muscle activation, hip movement, and stroke patterns, including possible contact between femur and ilium. Having an overly relaxed hip angle creates a similar scenario (but for the latter condition) including, inappropriate psoas recruitment, gluteal firing problems (resultant), etc.
Tips:
Be sure to adjust saddle height when making fore/aft adjustments. Moving the saddle aft increases saddle to pedal distance; forward, reduces saddle to pedal distance.
